Analog Office: Staying organised with job sheets.

This work is licensed under CC BY-SA 4.0
As I start writing more and more for Endpapers, I’ve run into a project management problem. I have a million and one ideas, and am prone to overcommitting. Some of this is due to a lack of visibility into the work I currently have in progress.
As a result, I’ve had a burning question in mind: how do you manage projects if all you have is a pen and paper? Sure, today’s solution is an app, and that works for most people. I find that it is less helpful for me personally because the content isn’t visible. It’s trapped in the digital realm, only visible through the looking glass of my phone or computer.
The change to digital for project planning is only relatively recent in the history of human enterprise. How then was a design project managed in the latter half of the 20th century, when computers were non-existent or a luxury?
I did not have to search for long to find the answer. One of the books I’m reading currently is “The Organised Writer” by Anthony Johnston. It’s worth reading, even if you aren’t a writer. The task management ideas are useful to anyone doing creative work professionally. Back to the answer - Johnston talks about using “job sheets” to manage projects.
But what is a job sheet? Typically, they’re an A4 page attached to a manila folder to hold the papers related to a project forms the core for businesses such as design studios to manage their work. It’s a sheet of paper with the project details - client name, dates, contract type, etc - and a checklist specific for the type of work. For a writing project, a job sheet might have items such as research, outline, draft 1, draft 2, sent to editor, etc. Commercial ventures would also add items related to the financial side: invoiced, paid, settled, and so on. As the work is done, items are ticked off. It allows the people working on the project to see where it’s at with a glance.
The use of a folder like this has another appealing benefit for me - it makes the workload visible. I now have a few document trays stacked on my desk. Having a set of visible stacks for current work, and future ideas is immensely helpful in keeping me on track to actually finish and publish each project. On a lesser note, it also indulges my delight in the tangible analog nature of the work. Projects become real, and I am unconstrained by the limits of my device’s screen size as I work on them.
Designing my own template
A cursory web search did not turn up any templates that were suitable for my purposes. Truth be told, I didn’t look all that hard. Not having an off the shelf option is appealing, since I get to practice my design skills and build something that fits me like a glove. The goals for my bespoke job sheet template are twofold:
- Be economically printable on a mono laser printer (because I don’t own a colour printer).
- Allow me to figure out what my base process is so I can refine it into a more specific set of templates later
From my research, I had a reasonable idea of what would be useful for me on my job sheet design. It would be an A5 page, with project name and dates (start and finish). Why A5? Because my projects don’t yet feel large enough to justify the waste of an A4 page.
From past explorations of bullet journalling, I had come across Alastair Johnston’s analog project tracker. Given that my purpose for this first version was for it to be flexible so I could reveal the common elements, having a kanban board style design with a dot grid panel seemed like a pretty good idea. Unlike Alastair’s design, I simplified the states for a task to just “to-do”, “doing”, and “done”.
Already I could think of a few common entries - notes, outline, first draft, edits, second draft, scheduled for publication, published. Creativity tends to beget more creativity, it’s not usually a finite resource. Nevertheless, I’ll try these out by hand and add them as printed elements if my intuition is correct.
"I think of product development like a corkscrew because you feel like you’re walking in circles but the circles are actually leading you somewhere"
– Simone Giertz, inventor & youtuber
The process for arriving at the final design was one of iteration, rendering increasing levels of detail and coherence. I started by blocking out the key areas of the design with solid shapes. Doing this early allows me to get the proportions correct, and make sure everything is (to my eyes) balanced.
Once the blocks are in place, I refined each one - adding the elements I already had in mind. In ever increasing spirals, I iterated on the small details. Font choice, font weight, spacing, colour choices (between shades of grey, and a hatched pattern.
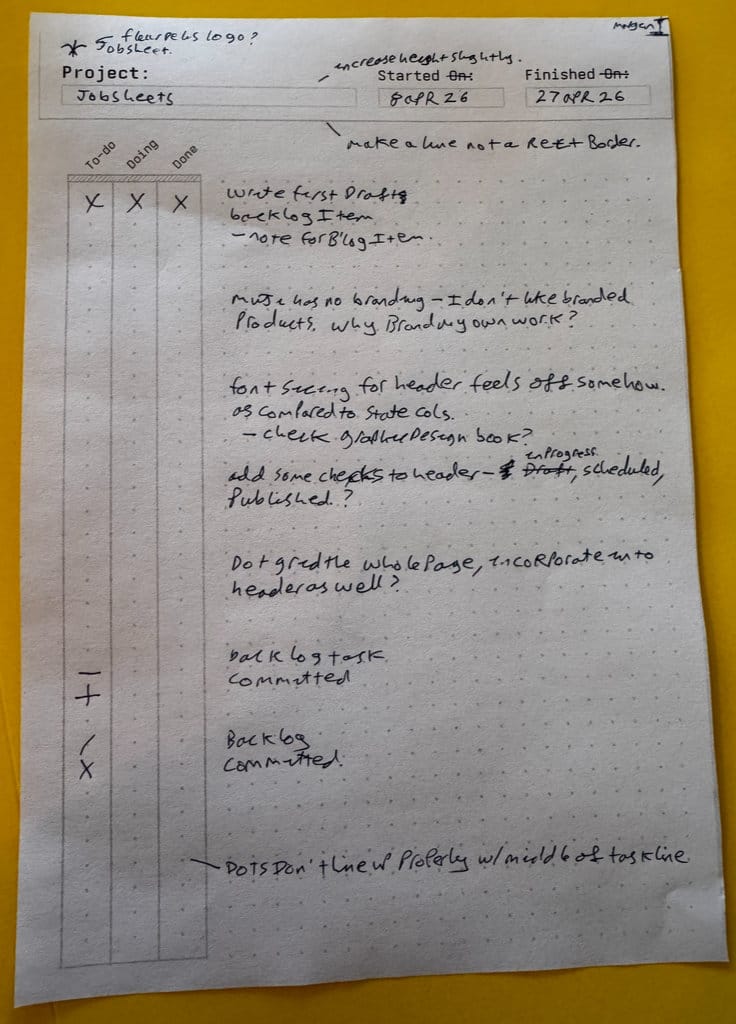
Once I had a draft version I was happy with, it was time to print it out and give it a pass in the real world. This gives me a chance to check the sizings for each entry box, and eyeball the sizing. As seen in the above, I’ve made notes and drawn in ideas for revisions to make the design more coherent and useful.
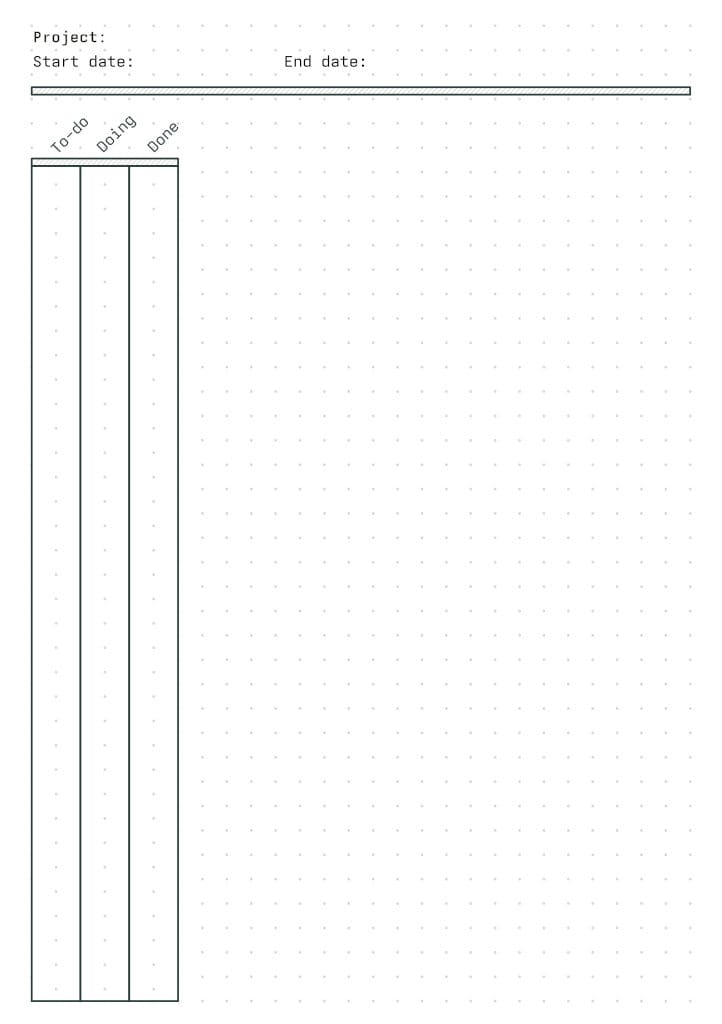
The final version is simple, containing only the essentials that are needed to meet the goals I had for this project. The process for using my generic job sheet is simple .
- Attach a job sheet to a manila folder
- Add the start date and project name
- Add the tasks you know you need to do in the dot grid section
- Cross off the “To-do” bullets for each of your new tasks
- Pick a task and cross off “Doing”.
- Do the task.
- Cross off “Done”
- Repeat from step 5 until the project is completed
- Fill in the finish date
A cross in each column isn’t the only mark we could use. Let’s say I had a task that was a nice-to-have for the project, but that I could drop or do last. Instead of committing to it with a cross in the to-do column, I can add a “/“ instead. This keeps the visual contrast, and marks the task as droppable if the deadline doesn’t allow it.
Conceivably, we could get weirder with it. Instead of the cross and slash option, we could adapt Patrick Rhone’s Dash/Plus symbols, and use a dash for the optional task and a plus for the committed/final state of a column.
Finding a marking system that works (or even just experimenting with different options) is part of the fun of fitting a new idea to your own measurements. Play with the ideas, and keep what suits you.
Conclusion
I doubt we’ve heard the last word on my job sheets designs. This is just the first version, the one I’ll use as a sieve to pan for my own personal processes. Once I’ve uncovered how I work, I’ll make a revision to include a set of permanent task items. The dot grid is likely to stay though, I like the flexibility it provides. We’ll see if the kanban device works out for me as well - maybe a checkbox would be a better fit.
I also have some ideas for a full colour design. The monochrome design is perfect for rapid prototyping, and printing on demand with my monochrome laser printer. Some handsome stationary for my projects sounds like just the thing to bring a little more joy to the process.
If you’re keen to try using these job sheets for yourself, I’ve attached them below. There’s both a printable PDF version (so you can start immediately), and the Affinity Studio source files. That way you can customise and remix the design to suit yourself (just remember the CC-BY-SA license conditions for the Endpapers works).
If you do customise the design, let me know - it would be great if we could create a gallery of designs for people to use, remix, and be inspired by.
Post Scriptum
This design work would have been a lot harder for me if not for Affinity Studio. I own a copy of the original Serif Affinity Designer, and was dismayed to learn that Serif had been purchased by Canva. However, the new Affinity Studio is currently free, and Canva has committed to properly keeping it that way - no pay gating for essential features. The only paid features are the generative AI, which I have no need for. Generative AI is for the lazy and incurious, and I am neither.
Time will tell if they keep to this promise, but for now it is a genuine alternative to Adobe’s Creative Suite. I’ll be doing a proper round up of actually free open source alternatives later. (And no, I’m not sponsored by Canva, I’m just a fan of Serif’s original software)
No spam, no sharing to third party. Only you and me.